Installing an LED downlight can seem like a daunting task, especially if you’re not particularly handy around the house. However, with the right guidance and a bit of patience, it can be a straightforward DIY project. As an experienced LED downlight supplier, I’ve seen firsthand how these lighting fixtures can transform a space, providing both functionality and aesthetic appeal. In this blog post, I’ll walk you through the step-by-step process of installing an LED downlight, from preparation to the final switch-on. LED Downlight
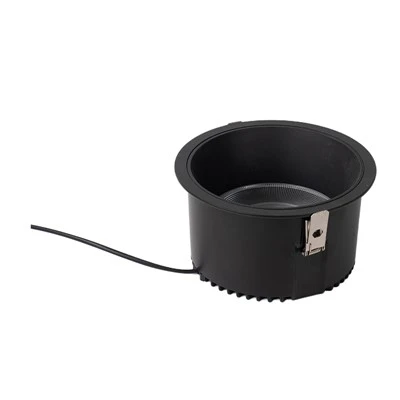
Step 1: Gather Your Tools and Materials
Before you begin the installation process, it’s essential to have all the necessary tools and materials at hand. This will ensure that the task goes smoothly and efficiently. Here’s a list of what you’ll need:
- LED downlight kit: This should include the downlight unit, a ceiling mounting bracket, and any necessary wiring. As a supplier, I recommend choosing high-quality LED downlights that are energy-efficient and long-lasting.
- Screwdriver: You’ll need a Phillips-head screwdriver to remove and install screws.
- Wire strippers: These are used to strip the insulation from the electrical wires.
- Voltage tester: This is a crucial safety tool that helps you determine if the power is off before working on electrical connections.
- Ladder: Depending on the height of your ceiling, you’ll need a stable ladder to reach the installation area.
- Pencil: Use this to mark the location where you’ll be cutting the ceiling.
Step 2: Plan the Installation
Proper planning is key to a successful LED downlight installation. Here are some important factors to consider:
- Location: Decide where you want to install the downlight. Consider the layout of the room, the existing lighting, and the areas that need additional illumination. For example, in a kitchen, you might want to install downlights above the countertop or sink.
- Ceiling type: Different ceiling types require different installation methods. If you have a drywall ceiling, you’ll typically need to cut a hole for the downlight. For a suspended ceiling, you may be able to use a mounting bracket that fits between the ceiling tiles.
- Electrical wiring: Identify the existing electrical wiring in the area where you’ll be installing the downlight. You’ll need to connect the new fixture to a live electrical circuit. It’s important to ensure that the circuit can handle the additional load. If you’re unsure, consult a qualified electrician.
Step 3: Turn Off the Power
Safety should always be your top priority when working with electricity. Before you start any electrical work, turn off the power to the circuit at the electrical panel. Use a voltage tester to double-check that the power is off before proceeding. This will prevent the risk of electrocution.
Step 4: Mark and Cut the Ceiling
Once you’ve determined the location of the downlight, use a pencil to mark the outline of the mounting bracket on the ceiling. Make sure the mark is centered and level. If you’re installing multiple downlights, use a measuring tape to ensure they are evenly spaced.
Next, use a drywall saw or a hole saw to carefully cut along the marked outline. Be sure to apply gentle pressure and follow the lines precisely. If you’re using a hole saw, make sure it’s the correct size for your downlight kit.
Step 5: Install the Mounting Bracket
After cutting the hole in the ceiling, it’s time to install the mounting bracket. This bracket will hold the downlight in place and provide support. Most mounting brackets come with pre-drilled holes for easy installation.
Insert the mounting bracket into the hole in the ceiling and align it with the edges. Use a screwdriver to secure the bracket to the ceiling using the provided screws. Make sure the bracket is firmly attached and level.
Step 6: Connect the Wiring
Now it’s time to connect the electrical wiring. This is a critical step, so it’s important to follow the manufacturer’s instructions carefully. Here’s a general guide on how to connect the wiring:
- Identify the wires: In your LED downlight kit, you’ll typically find three wires: a black (hot) wire, a white (neutral) wire, and a green or bare copper (ground) wire. The existing electrical wiring in your ceiling will also have corresponding wires.
- Strip the wires: Use wire strippers to remove about 3/4 inch of insulation from the ends of each wire.
- Connect the wires: Connect the black wire from the downlight to the black (hot) wire in the ceiling. Use a wire nut to secure the connection. Repeat this process for the white (neutral) wires. Finally, connect the green or bare copper (ground) wire from the downlight to the ground wire in the ceiling.
- Inspect the connections: Once the wires are connected, gently tug on each connection to ensure it’s secure. Make sure there are no loose wires or exposed conductors.
Step 7: Install the Downlight
With the wiring connected, it’s time to install the downlight into the mounting bracket. Carefully insert the downlight into the hole in the ceiling and align it with the mounting bracket. Most downlights have spring clips or other mechanisms that hold them in place.
Once the downlight is in position, use the provided screws or clips to secure it to the mounting bracket. Make sure the downlight is level and flush with the ceiling.
Step 8: Test the Downlight
Before you finish the installation, it’s important to test the downlight to make sure it’s working properly. Turn the power back on at the electrical panel and switch on the light. If the downlight doesn’t come on, double-check the wiring connections and make sure the power is on. If you’re still having problems, consult a qualified electrician.
Step 9: Finishing Touches
Once the downlight is working properly, you can add any finishing touches to the installation. This may include installing a trim or bezel around the downlight to give it a more polished look. Some downlights come with a pre-installed trim, while others require you to install it separately.
Conclusion
Installing an LED downlight is a rewarding DIY project that can enhance the lighting and ambiance of your home. By following these steps and taking the necessary safety precautions, you can install an LED downlight with confidence.
LED Ceiling Light As an LED downlight supplier, I’m committed to providing high-quality products and excellent customer service. If you have any questions or need assistance with your downlight installation, don’t hesitate to reach out. Whether you’re a homeowner looking to update your lighting or a contractor working on a project, we have the right LED downlights for you. Contact us today to discuss your lighting needs and explore our range of products. We look forward to working with you.
References
- "Home Wiring Handbook" by Black & Decker
- Manufacturer’s installation instructions for LED downlights.
Debesen (Shanghai) Optoelectronics Technology Co., Ltd.
We are one of the most professional led downlight manufacturers and suppliers in China, featured by quality products and good service. Please rest assured to wholesale advanced led downlight in stock here and get quotation from our factory. We also accept customized orders.
Address: No.258 Xiucheng Road, Fengcheng Town Economic Development Zone, Fengxian District, Shanghai
E-mail: Debesen258wendy@163.com
WebSite: https://www.debesen.com/
